Migrating HockeyApp deploy to AppCenter
Why
AppCenter is the new future of HockeyApp. Why? Because of its automated lifecycle.
The process of releasing new versions for a mobile app becomes a routine at some point.
But what if this routine wouldn’t be required anymore in order to have a fresh release?
Using AppCenter you can create a Continuous Deployment system that will allow shipping new releases by simply pushing commits into a branch.
“But this sounds like Jenkins!”
Yes, AppCenter is Jenkins for mobile applications and more.
From scratch with React Native
In the following lines I’m gonna share a step by step tutorial on how to integrate a CD system with a React Native application.
For the purpose of this tutorial, let’s create a new application called "AppCenterTutorial".
We open up a new terminal instance and type:
>> react-native init AppCenterTutorial
Make sure the app builds successfully on both iOS and Android.
Since AppCenter does its job by being connected to a source control, be sure that your local project is tied with a Github, Bitbucket or Azure DevOps repository.
Now head over to appcenter.ms and create a new account.
We need two applications: one for iOS and one for Android.
iOS Setup
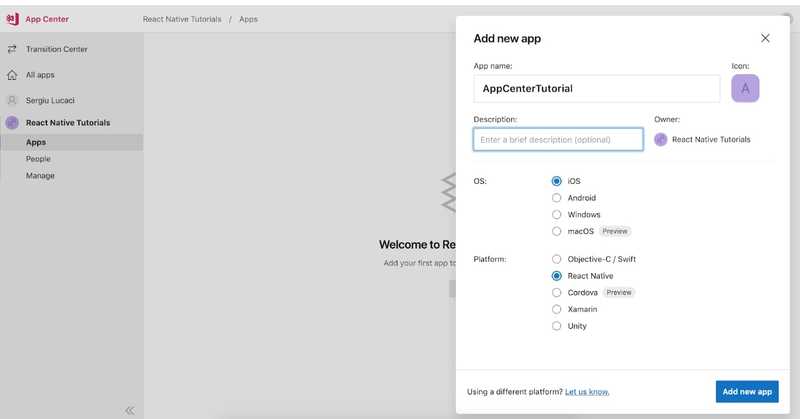
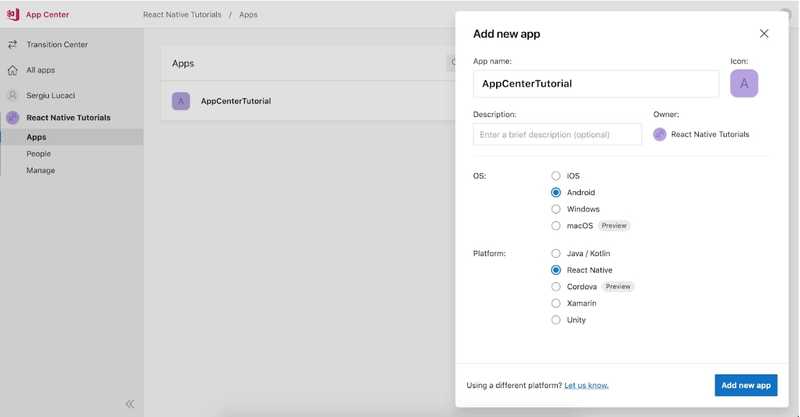
As you can see bellow, creating a new application is pretty straightforward.
In order to use AppCenter’s services we have to install its SDK. In our project’s path we type:
>> yarn add appcenter appcenter-analytics appcenter-crashes --exact
For linking AppCenter’s packages, we can use Pods or do it manually. We’ll go with Pods this time. But you can do it manually if you want to, I did that on a recent project without many headaches.
We have to make sure that we’re using the latest version of Pods.
Being placed under /ios path we type:
>> pod init
Below is my Podfile, but heads up: your AppCenter’s services' versions might be different from mine.
# Uncomment the next line to define a global platform for your project
# platform :ios, '9.0'

target 'AppCenterTutorial' do
  pod 'AppCenter/Crashes', '~> 1.12.0'
  pod 'AppCenter/Analytics', '~> 1.12.0'
  pod 'AppCenterReactNativeShared', '~> 1.11.0'

  # Uncomment the next line if you're using Swift or would like to use dynamic frameworks
  # use_frameworks!

  # Pods for AppCenterTutorial

  platform :ios, '9.0'
  target 'AppCenterTutorial-tvOSTests' do
    inherit! :search_paths
    # Pods for testing
  end

  target 'AppCenterTutorialTests' do
    inherit! :search_paths
    # Pods for testing
  end

end
Once we have Pods initialized into the project, we can link AppCenter’s packages automatically by typing:
>> react-native link
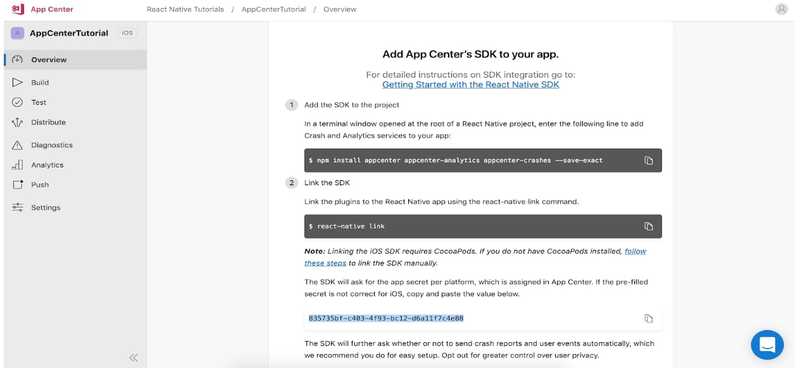
When prompted, for Android we don’t have to submit any app secret at this point, we’ll add it afterwards. For iOS though, we make sure that we’re using the one generated on AppCenter. I’m talking about this one:
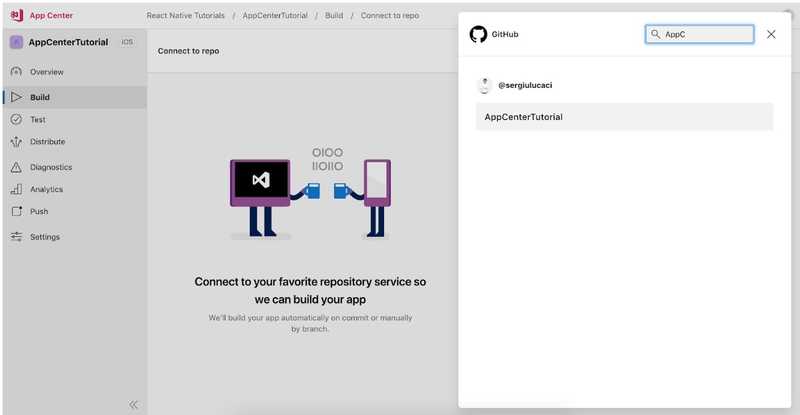
As stated above, we must connect to our Github repository.
Once we’re connected to Github, we can configure any branch we want. Let’s go for the master one.
We have to make sure we choose the same version of Xcode that runs on our computer to prevent versioning conflicts.
AppCenter will choose automatically the package.json and the expected scheme. As you can see, we could add build scripts, but at this point we won’t do that.
We want to build this branch on every push and to automatically increment the build number.
In order to test this app on real devices we have to create a Development Provisioning Profile and a .p12 Certificate.
How to get a Provisioning Profile
1) Go to https://developer.apple.com/account/ios/identifier/bundle/create and create a new app identifier.
2) Go to https://developer.apple.com/account/ios/profile/create and create a development provisioning profile, continue with the following steps, download it and place it safely.
How to get a .p12 Certificate
If you don’t have a certificate, follow these instructions.
Otherwise, if you’re part of a team that has a valid certificate:
1) Go to https://developer.apple.com/account/ios/certificate/development and download a valid certificate.
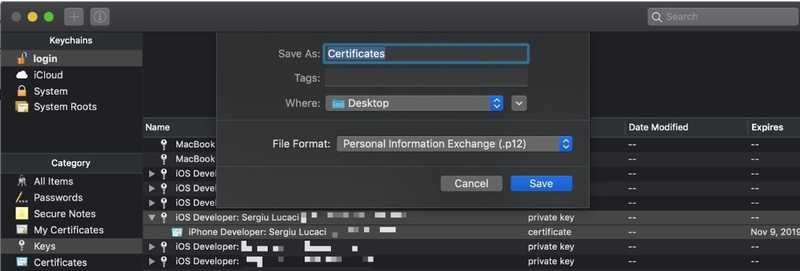
2) Now, open Keychain Access -> Keys -> Select both private key and certificate and export them into a .p12 file, like below:
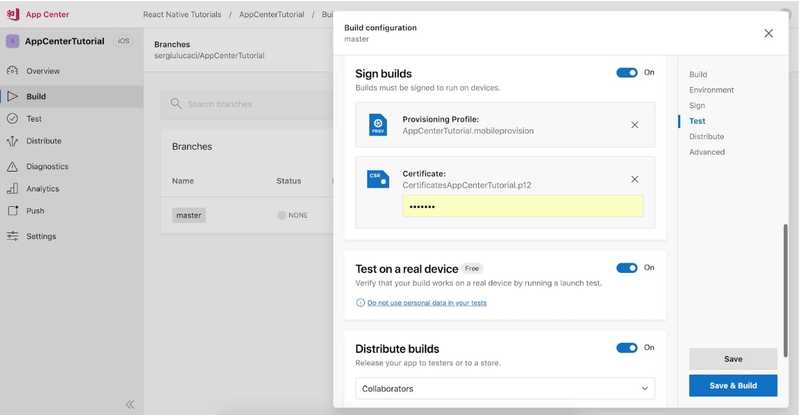
We can upload now the exported .p12 Certificate and the .mobileprovision file to the build configuration.
Also, make sure you placed these files into a safe place, because in the future you might configure other branches, so you won’t have to repeat the previous steps again.
As you can see below, AppCenter is able to verify if the build successfully runs on a real device right before distributing it.
Take note that this means more time spent on the building process.
This is how the build configuration looks like at this point.
Let’s make the magic by hitting “Save & Build”.
If your build is waiting to be processed for a few minutes, don’t worry. They won’t forget about you.
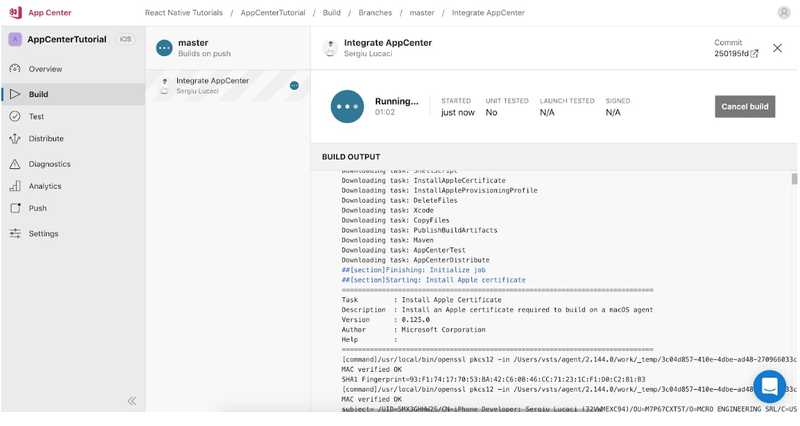
Once it’s processing, it will look like:
That’s for iOS.
Android setup
The step for creating a new Android application is very similar with the iOS one.
Now we need to place the generated app secret into /android/app/src/main/assets/appcenter-config.json.
AppCenter’s services were linked automatically during the iOS’s steps, and now we can connect to Github.
We’ll configure the master branch for Android too.
Similar to the iOS configuration, we’ll choose to skip the build scripts, build this branch on each push and automatically increment the build number.
In order to sign the build we’re required to generate a signed APK. We’ll let AppCenter take care of setting up gradle variables and signing configuration.
We just have to generate a Keystore file by typing:
>> sudo keytool -genkey -v -keystore my-release-key.keystore -alias my-key-alias -keyalg RSA -keysize 2048 -validity 10000
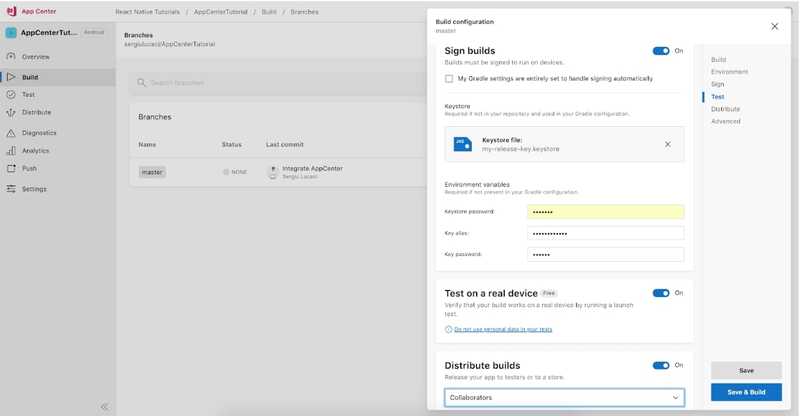
We upload the generated keystore file together with placing the Key alias and the passwords into the build configuration.
Similar to iOS, we want to test the build on a real device before distributing it.
Last steps of the configuration looks like this:
To see the magic, we click on "Save & Build".
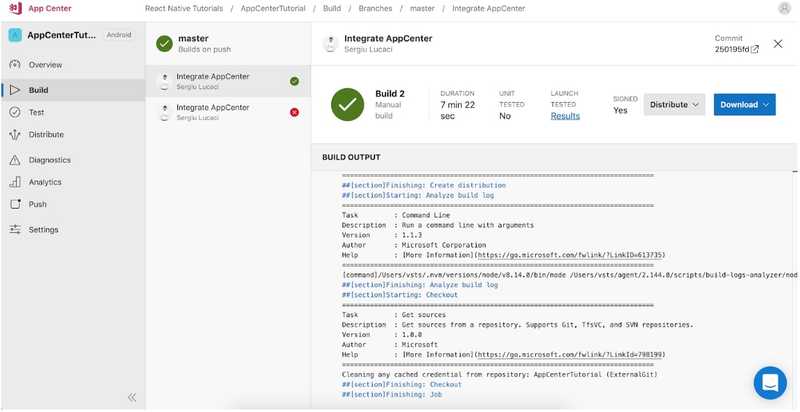
If everything is setup correctly and the code passes all tests, the build will succeed:
Harvest
Once the build was successfully done, tested and distributed, the collaborators should be notified via email. The process of installing the app is straightforward.
iOS related: take note that if you created a Development Provisioning Profile, the collaborators’ devices must be added to the Provisioning Profile. Otherwise they won’t be able to install the application.
Now that we have both builds successfully configured, we push a new version of the code into the master branch.
As you can see below, our builds are queued immediately:
Conclusion
Testflight or HockeyApp combined with Fastlane do save a lot of time but if you need continuous build, test, release, distribution and app monitoring, AppCenter is what you want. This is definitely the future of Continuous Deployment for mobile applications.
